Home › Kitchen › Renter-Friendly Kitchen Organization
Renter-Friendly Kitchen Organization: The Complete No-Drill System
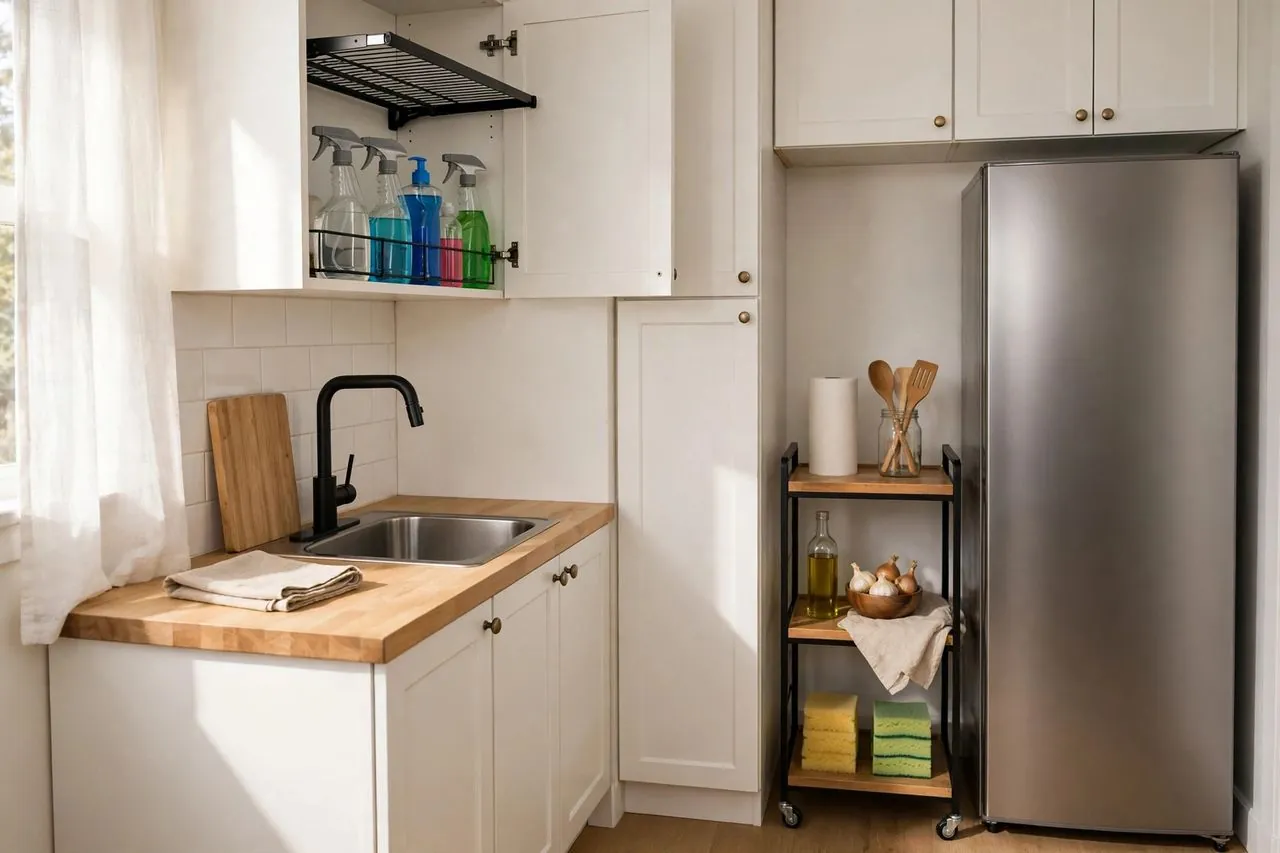
Renter friendly kitchen organization works as one no-drill system, not a pile of products: over-cabinet-door racks, an under-sink tension setup, a magnetic fridge side, a single countertop rack, in-cabinet risers, and a door pantry. Measure each zone first, give every category one home, and everything lifts out at move-out.
Let me guess your kitchen, because I've lived in it too. Two cabinets are somehow both overflowing and half empty. The under-sink space is a cave where spray bottles go to fall over. Your counter has about one cutting board of free space, and the lease — the lease says no screws, no nails, no modifications, thank you very much. You're not messy. Your kitchen simply has no system, and rental kitchens are built with so little storage that "just tidy up" was never going to work. If your worst spot is the cabinet doors, this is the first category worth a look while you read: Check Price on Amazon
Here's what changed things for me, and it's the idea this whole guide is built on: stop shopping for organizers and start assigning zones. A renter kitchen has six zones that are secretly storage — the backs of cabinet doors, the under-sink void, the side of the fridge, one disciplined stretch of counter, the wasted air inside your cabinets, and the pantry or kitchen door. Each zone gets one method, one kind of pick, and one honest warning about how it fails. Put together, they behave like a system: everything you own gets exactly one home, cooking stops being an excavation, and on move-out day every piece lifts off, slides out, or unhooks with the deposit exactly as safe as the day you arrived. That's the philosophy behind our whole Kitchen hub, and it pairs naturally with the wall side of rental life in our renter-friendly wallpaper guide.
If your worst zone is the cabinet doors — and for most renters it is — this is the category to look at first while you read: Check Price on Amazon But please measure before you buy anything, including that. The measure-first method in this guide takes ten minutes and is the difference between a system and a drawer full of almost-right organizers.
Start here: the six zones at a glance
Read this table as a map, not a shopping list. The constraint column tells you what to measure, and the catch column tells you how each zone betrays people — because every organizer fails in a predictable way, and knowing the failure mode before you buy is worth more than any star rating.
| Pick | Best for | Type | Key constraint | The catch |
|---|---|---|---|---|
| Over-cabinet-door rack system | Lids, wraps, towels, and cleaning bits you reach for daily | Over-door hooks and baskets, no adhesive | Door must close fully with the hook thickness in place | The number one failure in this guide: hooks that stop the door sealing, then rattle and chip paint at the contact points |
| Under-sink tension system | Spray bottles and cleaning supplies in the pipe cave | Tension rod plus hanging and stackable bins | Cabinet width and pipe positions decide everything | A rod under real tension can slip if the cabinet walls are slick or the load hangs unevenly |
| Magnetic fridge-side system | Spices and daily tools in kitchens with a steel fridge side | Magnetic shelves and racks | Only works on a magnetic steel surface, check yours first | Overloaded magnetic shelves can slide down slowly, especially in warm kitchens near the stove |
| Countertop rack system | One disciplined prep and coffee zone | Freestanding tiered rack or shelf | Must leave a clear landing space beside the stove | A rack can become decorated clutter storage if you do not give it a strict job description |
| In-cabinet risers system | Doubling plates, mugs, and pantry shelves | Stackable shelf risers and tiered inserts | Interior cabinet height between shelves decides the sizes | The wrong height wastes the very air you bought it to save, so measuring is not optional |
| Door and pantry system | Snacks, wraps, and overflow in door rich kitchens | Over-the-door pocket or wire rack | Door clearance at the top and hinge side | A loaded door rack swings its weight on the hinges and can bang the frame if you overfill it |
This system is for you if: you rent, you cook at least a few times a week, your cabinets are fixed and shallow, and your frustration is finding things rather than owning too many things. It is especially for you if you have at least a year on your lease — long enough for a real system to pay you back every single day, in a kitchen that finally feels calm when you walk into it.
Skip or shrink this system if: you are moving within a couple of months (borrow the ideas, buy nothing), your landlord has banned even over-door hooks in writing, or your real problem is volume — three bread makers and forty mugs will defeat any organizer, and an honest declutter weekend will do more than this guide can. Skip individual zones, too, whenever the constraint column says your kitchen cannot host them; a five-zone system that fits beats a six-zone system that fights your doors.
A word on order, because sequence is half the system. Work the zones in the order they're listed below: doors, under-sink, fridge side, counter, cabinet interiors, pantry door. That order moves the daily-grab items first, which frees counter and cabinet space, which then shows you what actually still needs a home. Renters who start by buying pantry containers usually end up organizing things they were about to throw away. And keep one principle taped inside a cabinet door where you'll see it: the counter is a workplace, not a warehouse. Everything in this guide exists to defend that one sentence.
Best for cabinet doors: over-cabinet-door rack system
The back of a cabinet door is the most underused real estate in a rental kitchen, and this zone is where I'd spend first. An over-cabinet-door system hangs from hooks that loop over the top of the door — no screws, no adhesive, nothing to remove at move-out except the rack itself. The classic setup is a slim basket or rail on the under-sink doors for cleaning cloths and bin bags, a lid holder on a lower cabinet door, and a towel bar on another, so the things you grab with wet hands live exactly where your hands already are.
Why the method works: doors move with you through the kitchen's workflow. Wraps and foil on the inside of the door beside your prep counter end the daily drawer dig. A lid rack ends the pot-lid avalanche, which every renter knows intimately. And because the hardware just hooks on, you can rearrange the whole zone in an afternoon when your cooking habits change — no holes to fill, ever.
Now the honest failure mode, because this zone owns the biggest one in the guide. If the hook metal is thicker than your door's closing clearance, the door stops sealing: it rattles, it swings shy of closed, and the hook contact points can rub and chip the paint on the door top and frame over months of opening and closing. Test with one hook before you buy a set: hang it, close the door slowly, and check the seal and the top edge. Felt pads or a strip of soft tape on the hook's contact points protect the paint. Measure hook width against door thickness too — doors vary more than listings admit.
Who should skip this one: anyone whose cabinet doors already close tightly with zero spare clearance, anyone with soft or already-chipping paint on the door tops, and anyone planning to hang genuinely heavy items — these racks are for lids, wraps, towels, and light supplies, not for cast iron.
What to check on the listing: hook thickness and the door thickness range it fits, whether the basket depth will clear your cabinet's interior shelves and plumbing when the door closes, the stated weight guidance, and whether protective pads are included. Then do the one-hook test before committing the whole kitchen. Check Price on Amazon For doors that deserve their own deep dive, including full length pantry doors, see our best over-the-door organizers guide.
Best for under the sink: tension rod and bin system
Every rental kitchen has the same under-sink cave: pipes in the middle, a strange smell of good intentions, and a dozen bottles lying where they fell. The tension system fixes the cave without touching a single surface permanently. A spring tension rod stretches wall to wall across the cabinet, and your spray bottles hang from it by their triggers — which instantly turns one flat, pipe-divided floor into two levels. Below, a small stackable bin or a sliding basket corrals sponges, dishwasher tablets, and the spare bin bags, grouped instead of scattered.
Why the method works: hanging bottles by the trigger uses the one part of the bottle that is already a hook, keeps every label facing you, and lifts cleaning supplies off the cabinet floor — which matters in the one cabinet most likely to see a slow drip someday. The zone also has a natural job description, and job descriptions are what keep systems alive: only cleaning lives here. The moment food storage or spare appliances creep in, the cave returns.
The honest failure mode: tension is a promise the cabinet walls have to keep. On slick laminate interiors, or with a rod stretched near its maximum length, a heavily loaded rod can slip and drop its bottles at 2 a.m. with a crash that will take years off your life. Prevent it by measuring the interior width precisely and choosing a rod whose comfortable middle range — not its stretched limit — matches your cabinet, by hanging the heaviest bottles nearest the walls, and by checking under there for any existing damp before you organize: never build a system over a leak, and tell your landlord about moisture the week you find it, in writing.
Who should skip this one: anyone with an active or suspected under-sink leak (fix and report first), anyone whose cabinet is too narrow for a rod plus bins to coexist with the pipes, and anyone hoping to store food under there — cleaning and food never share a zone.
What to check on the listing: the rod's stated length range and whether your measured width sits mid-range, the bin dimensions against your pipe positions (measure where the trap actually sits, not where you imagine it), and whether bin materials tolerate a damp environment. Sketch the cabinet interior on paper with three numbers — width, depth, height to the trap — before you order anything. Check Price on Amazon
Best for the fridge side: magnetic rack system
If your fridge stands with a side exposed — beside the counter, at the end of a run of cabinets — you are looking at a blank steel wall that most renters never use. A magnetic system turns it into the spice and daily-tools station: magnetic shelves for jars, a magnetic rack for the spices you reach for mid-cooking, a hook or two for the measuring spoons. Nothing touches your walls, nothing touches your deposit, and when you move, the whole station peels off in your hand and goes in a box.
Why the method works: spices are the classic counter-and-cabinet hogs — small, numerous, and always hiding behind the oil bottle. On the fridge side they sit in single file, labels out, at eye height, beside the stove where you actually use them. It also gives a small kitchen something precious: a category with a complete, visible home, so you stop buying a third jar of paprika because the first two were lost in a cabinet. Our dedicated magnetic spice rack guide goes deeper on this one zone if spices are your main battlefield.
First, the test nobody should skip: magnets do not stick to every fridge. Stainless finishes vary, some are only lightly magnetic, and a fridge tucked flush inside a cabinet surround has no usable side at all. Take any magnet off your fridge door — if it grips the side firmly, you're in business; if it slides or won't hold, this whole zone is a skip for your kitchen, and the door system above takes over spice duty instead. The honest failure mode is slow-motion: an overloaded magnetic shelf, especially in the warmth near a stove, can creep downward over weeks and then let go. Load shelves modestly, keep the heaviest jars on the lowest shelf, and re-seat the magnets when you wipe the fridge down.
Who should skip this one: anyone whose fridge side is non-magnetic, enclosed, or blocked by a wall, and anyone planning a heavy can-and-bottle collection up there — magnets are for jars and tools, not for a cellar.
What to check on the listing: the shelf dimensions against your actual exposed side (measure height as well as width, and watch for the hinge swing of the fridge door), the stated load guidance, and whether the magnet covers the full back of the shelf — full coverage grips and spreads weight far better than two small magnet dots. Check Price on Amazon
Best for the counter: single freestanding rack system
Notice the word single. The countertop zone of this system is one freestanding rack with one job — most renters give it the coffee and breakfast station, or the oils-and-utensils prep cluster — and everything that doesn't belong to that job lives somewhere else. A tiered rack lifts the job vertically: mugs or jars below, the daily tools above, and the counter footprint stays the size of one placemat instead of creeping across the whole worktop.
Why restraint is the method here: counters fail by accumulation, not by purchase. The rack works because it's a boundary. When the rack is full, the answer is never a second rack — it's a question about which item lost its job. Protect, too, the landing space beside your stove: one clear stretch of counter, big enough for a hot tray and a cutting board, is sacred in this system. The day you can't put a hot pan down is the day the kitchen stops being safe, not just untidy.
The honest failure mode: a beautiful rack becomes a decorated shelf for things you never use, and you've paid money to store clutter at eye level. It happens quietly — the souvenir mug, the gadget from a well-meaning gift — so audit the rack monthly with a ruthless question: did I touch this while cooking this week? Also check the practical stuff: a rack that's too tall collides with upper cabinets when you lift items off the top tier, and a wobbly rack near a stove edge has no place in a kitchen. Measure the counter-to-cabinet clearance before choosing a tiered design.
Who should skip this one: anyone whose counter is already down to one small prep area — your space is worth more than any rack — and anyone who knows, honestly, that flat surfaces in their home attract piles; give your daily station a drawer or the fridge side instead.
What to check on the listing: overall height against your under-cabinet clearance, footprint against your counter depth (leaving that landing space free), whether the tiers are fixed or adjustable, and the material's tolerance for steam and splashes near a stove. Wood looks warm and hates standing water; coated metal wipes down and forgives. Check Price on Amazon Renters building the same discipline in the next room will find the twin philosophy in our best no-drill shelves guide.
Best for inside cabinets: shelf risers and tiered inserts
Open any rental cabinet and you'll see the waste instantly: plates stacked on the bottom, and six inches of empty air floating above them, because cabinet shelves were spaced for a stockpot you'll never own. Risers and tiered inserts reclaim that air. A shelf riser is a small freestanding table that stands on your cabinet shelf and gives you a second level; a tiered, step-style insert turns a deep spice or tin shelf into stadium seating where every row can be seen.
Why the method works: nothing is installed. The riser sits there by gravity, lifts out in one hand at move-out, and yet the effect is the closest thing to doubling a cabinet that renting allows. Plates below, bowls above. Mugs below, glasses above. Tins at the back raised to eye level so the front row stops hiding them. This is also the zone where the system fixes the "buying duplicates" problem: when you can see all your food at a glance, you stop purchasing pasta you already own.
The honest failure mode is pure arithmetic. A riser bought for the wrong shelf height either won't fit, or fits and leaves two half-height gaps that hold nothing — you've spent money to make the air smaller. Measure the interior height between your shelves, subtract the height of the tallest item that will live under the riser, and let those two numbers choose the riser height, not the product photo. Second failure: overloading a light riser with stoneware until it bows or tips when you pull a plate. Keep heavy stacks on the cabinet's own shelf and let the riser carry the lighter level.
Who should skip this one: anyone whose cabinets have adjustable shelves you can simply re-space (do that first, it's free), anyone with very short shelf spacing where no riser plus item can fit, and anyone storing mostly tall bottles — vertical problems need door or fridge zones, not levels.
What to check on the listing: the riser's height, width, and depth against your measured shelf, whether the width is expandable, the stated load guidance, and leg style — solid legs survive plate stacks better than thin wire on cheap versions. Measure two cabinets, because rental cabinets are rarely identical twins. Check Price on Amazon
Best for the pantry and kitchen door: over-door rack system
The last zone is the biggest door you own. A pantry door — or the kitchen door itself — fitted with an over-the-door rack becomes shallow, visible, single-file storage for the items that ruin deep shelves: spice packets, wraps, snack bars, vitamins, the good scissors, the spare sponges. Shallow is the whole point. Nothing can hide behind anything else on a door rack, which makes it the natural home for small, losable things.
Why the method works: it converts a surface you open twenty times a day into storage that presents itself to you. Renters without a pantry closet get the biggest win — the door rack effectively is the pantry, and paired with the risers zone inside a cabinet for tins and jars, a doorless kitchen gains a two-part pantry that costs no floor space at all. Hooks over the top mean zero installation and a thirty-second removal at move-out.
The honest failure mode: weight and swing. A door is a moving wall, and a heavily loaded rack multiplies on the hinges every time the door swings — doors can start to sag, racks can bang the frame, and glass jars can clink themselves into trouble. Load the door with light, flat, forgiving items; keep glass and heavy tins in cabinets; and run the same door-seal test as the cabinet zone: hooks on, door closed slowly, check the top gap and the latch. Some doors in older rentals are simply too tight or too fragile for any over-door hardware, and discovering that with a test hook costs nothing.
Who should skip this one: anyone whose pantry is a curtain or a bi-fold door (over-door racks need a standard swinging door with top clearance), anyone whose door already sticks or sags, and anyone tempted to store oils and glass bottles up high where a swing can launch them.
What to check on the listing: hook fit for your door thickness, total rack height against the door (and against anything the door opens toward), basket depth so stored items clear the frame as the door closes, and the stated load guidance per basket. Our over-the-door organizers guide compares formats in more depth, and the same door logic extends to the bathroom in our renter-friendly bathroom storage guide. Check Price on Amazon
Measure first: the ten-minute method that saves every zone
Every failure mode in this guide was a measuring failure wearing a costume. So here's the ritual, once, before any order: grab your phone, a tape measure, and something to write with, and take the system's six measurements. One, cabinet door thickness and closing clearance — slip a coin stack or a folded card over the door top and close it slowly; if it binds, that door gets no hooks. Two, under-sink interior: width wall to wall, depth, and the height and position of the trap and pipes, sketched roughly to scale. Three, fridge side: width and height actually exposed, plus the magnet test with a fridge magnet dragged firmly across the steel. Four, counter: depth, and the vertical clearance from counter to the underside of the wall cabinets, which decides whether a tiered rack can live there. Five, cabinet interiors: shelf-to-shelf height in at least two cabinets, plus shelf depth, written down per cabinet because they will differ. Six, the pantry or kitchen door: thickness, top clearance, and a slow test-close with a sample hook if you have one. Photograph the tape against each measurement — those photos live on your phone and settle every "will it fit" question at the moment of ordering, which is when money gets saved. And one habit that sounds fussy and saves fortunes: order for one zone, live with it for two weeks, then order the next. Systems built gradually fit your real cooking; systems bought in one excited evening fit the person you imagined being.
Putting the zones together: a starter sequence
Week one, doors and under-sink, because both are cheap, fast, and immediately end the two worst daily annoyances — the lid avalanche and the bottle cave. Week two, cabinet risers, once the door zone has absorbed the wraps and lids and shown you what the cabinets actually still hold. Week three, the fridge side if your magnet test passed, moving spices out of the cabinets and freeing a whole shelf in the process. Week four, the counter rack and the pantry door, in whichever order your kitchen's pain demands. By the end of the month the system is complete, and — this is the part nobody believes until they live it — the weekly reset takes five minutes, because a reset is just everything returning to its one assigned home. Renters often pair the finished kitchen with the matching wall refresh from our Peel and Stick hub, and the splash zone specifically with our peel-and-stick backsplash guide, so the room feels renovated while every single element remains fully reversible.
Mistakes and red flags: what not to buy
The rental-kitchen marketplace is full of products that photograph beautifully and behave badly in a deposit-conscious home, so learn the silhouettes. Red flag one: adhesive shelf and rack systems that promise enormous loads on painted walls or cabinet doors — in a steamy kitchen, adhesives soften, and when they let go they can take paint with them; the whole point of this guide's system is hooks, tension, magnets, and gravity, none of which bond to your landlord's property. If you do use any adhesive product from our adhesive shelves research style of category, keep it on tile or metal, never on paint. Red flag two: screw-in anything marketed to renters — an under-cabinet rail that "only needs four small screws" needs four repairs at move-out. Red flag three: organizers with no dimensions listed, or dimensions in the photos but not the description; in kitchen storage, unlisted size is a returns queue waiting to happen. Red flag four: giant multi-piece "complete kitchen sets" — sets are how you pay for six pieces to use two, and the unused four become the clutter. Red flag five: anything that must be cut, trimmed, or permanently fitted to your specific cabinets — fitted is the opposite of portable, and portability is a renter's whole advantage. Behavioural mistakes count too: buying before measuring (the classic), organizing before deciding what leaves (organizing clutter just gives it nicer housing), assigning the counter more than one job, and storing food under the sink where leaks and cleaning chemicals live. The system is deliberately small. Six zones, honest jobs, nothing bonded, nothing drilled — that's not a limitation of this guide, that is the entire design.
Removal and protecting your deposit
The beautiful secret of a no-drill system is that move-out is boring — and boring is exactly what you want. Still, do it like someone who documents. Before you install anything, photograph each cabinet interior, door, and counter as you found them; those "before" photos are your baseline if a question ever arises. While you live there, protect the contact points: felt pads under rack feet and on over-door hook contact spots, a liner on the under-sink floor to catch drips before they reach the cabinet, and a monthly glance at door tops where hooks rub. Kitchens generate grease film on everything, so in your last week, wipe down the zones your system touched — fridge side, door edges, cabinet interiors — with a degreasing kitchen cleaner; a surprising number of "damage" deductions are really cleaning deductions wearing a costume. Removal itself is the installation backwards: racks lift off doors, the tension rod twists down, magnets peel away by hand, risers lift out. No filler, no paint, no patching, because nothing ever bonded or pierced. Then walk the kitchen once with your move-in photos open on your phone, side by side, the same habit our deposit protection guide teaches for every room. Renters who finish here usually tell me the system was the easy part to give up — the hard part is leaving a kitchen that finally worked. Take the system with you. It was always yours; the kitchen was only ever borrowed. For the wider apartment, our no-drill storage hub and bathroom hub apply the same zones-and-gravity thinking room by room, and the no-drill shower caddy guide solves the wettest room of all.
Frequently asked questions
- What is renter friendly kitchen organization?
- It is a system of storage that adds no holes, no screws, and no permanent adhesive to a rented kitchen. Hooks over doors, tension inside cabinets, magnets on the fridge, and freestanding pieces do all the work, so every element lifts out at move out. The system part matters as much as the hardware: each category of item gets one assigned home.
- How do I organize a rental kitchen without drilling?
- Work in zones rather than buying random organizers. Put lids and wraps on over cabinet door racks, cleaning bottles on an under sink tension rod, spices on a magnetic fridge side rack, one daily station on a single countertop rack, levels inside cabinets with risers, and small overflow on a pantry door rack. Measure each zone first and the pieces will fit together.
- Will over cabinet door hooks damage my doors?
- They can if the hook is thicker than your door closing clearance, because the door then rubs and rattles and the contact points can wear the paint. Prevent it by testing one hook first, closing the door slowly to check the seal, and adding felt pads at contact points. Keep loads light and the hooks are one of the safest tools a renter owns.
- How do I organize under the sink with all the pipes?
- Hang spray bottles by their triggers from a tension rod stretched across the cabinet, which lifts them off the floor and turns one level into two. Then corral sponges, tablets, and spare bags in one small bin beside the pipes. Measure the width and note exactly where the trap sits before ordering, and never store food in this zone.
- Does a magnetic spice rack work on every fridge?
- No, and testing takes ten seconds. Drag a fridge magnet firmly across the side panel: some stainless finishes are only lightly magnetic and some are not magnetic at all. If the magnet grips, a magnetic system is one of the best zones in a rental kitchen. If it slides, skip the zone and give spices to the door rack instead.
- What should stay on the counter in a small rental kitchen?
- Only the one daily station you actually cook with, such as coffee making or your prep oils and utensils, held in a single rack with a clear boundary. Protect one landing space beside the stove big enough for a hot tray and a cutting board. Everything used less than daily belongs in a cabinet, on a door, or on the fridge side.
- How do shelf risers double my cabinet space?
- A riser is a small freestanding shelf that stands on your cabinet shelf and creates a second level in the wasted air above your plates or mugs. Nothing is installed, so it lifts out in one hand at move out. Measure the shelf height and your tallest item first, because a riser in the wrong height wastes the very space it was bought to save.
- What is the best first zone to organize?
- Start with the cabinet doors and the under sink cabinet, because they fix the two annoyances renters feel every day: the pot lid avalanche and the fallen spray bottle cave. Both zones are inexpensive, fast, and fully reversible. Their success also frees cabinet and counter space, which shows you honestly what the remaining zones actually need to hold.
- Can I use adhesive organizers in a rental kitchen?
- Use them with real caution, and never on painted walls or cabinet doors. Kitchen steam and grease soften adhesives over time, and a failed adhesive mount can pull paint away when it lets go. On tile, metal, or the inside of a sink cabinet they are a safer bet. Hooks, tension, magnets, and gravity remain the deposit safe core of this system.
- How do I know if an organizer will fit before I buy it?
- Take six measurements and photograph the tape against each one: door thickness and clearance, under sink width and pipe positions, exposed fridge side size, counter depth and height to the wall cabinets, shelf heights in two cabinets, and pantry door thickness. Compare those numbers with the listing dimensions rather than the photos, and order one zone at a time.
- How much should I load onto a door rack?
- Keep door racks for light, flat, forgiving items: wraps, packets, snacks, towels, lids, and spare sponges. A door is a moving wall, and heavy loads work on the hinges with every swing and can bang the frame or sag the door over time. Glass jars, oils, and heavy tins belong on cabinet shelves where the weight rests on something still.
- What do I do if my kitchen has no pantry?
- Build a two part pantry from the zones you do have. An over the door rack becomes the shallow, visible store for packets, wraps, and snacks, while risers inside one cabinet create levelled space for tins and jars. Many renters find the door actually beats a deep pantry shelf, because nothing can hide at the back and get forgotten.
- How do I keep the system tidy after the first month?
- Give the kitchen a five minute weekly reset where everything returns to its one assigned home, and audit the countertop rack monthly by asking whether you touched each item while cooking that week. Systems fail by slow creep, not by disaster, so small honest resets beat occasional heroic reorganizations. If an item has no home, the answer is a decision, not another box.
- Is a rolling cart a good idea in a rental kitchen?
- A slim cart can work well in a genuine gap beside the fridge, and it is fully freestanding, so it is deposit safe. Measure the gap precisely first, because most rental gaps are narrower than they look and a cart that almost fits is pure frustration. Choose it as an extra zone only after the six core zones are working, not as a substitute for them.
- What should never be stored under the kitchen sink?
- Never store food, dry goods, or anything in cardboard under the sink. It is the cabinet most likely to see a slow drip, it shares air with your cleaning chemicals, and boxes drink moisture and fail quietly. Keep that zone for cleaning supplies in wipeable bins, raised off the floor where you can spot a leak early and report it fast.
- How do I organize a kitchen I share with roommates?
- Zones make sharing easier because the system, not memory, decides where things live. Agree the job of each zone together, keep shared tools in the most reachable zones, and give each person one shelf or one door basket that is fully theirs to arrange. A five minute shared reset once a week prevents the slow drift into separate, competing piles on the counter.
- Will this system really come out clean at move out?
- Yes, because nothing in it bonds, pierces, or fixes to the property. Hooks lift off doors, the tension rod twists down, magnets peel away by hand, and risers and racks simply lift out. Photograph every zone before you install and after you remove, wipe away cooking grease film, and the kitchen returns to exactly the condition your move in photos show.
- What if my landlord bans even removable organizers?
- Follow the lease and any written instruction from your landlord, because no organizer is worth a dispute. A short, polite message explaining that the pieces are freestanding, hook on, and fully removable often resolves the worry, since most bans are aimed at screws and damage. If the answer stays no, freestanding floor shelving inside your own furniture footprint is usually still possible to discuss.