Home › Peel and Stick › Best Peel-and-Stick Backsplash
Best Peel-and-Stick Backsplash for Renters (and What Is NOT Removable)
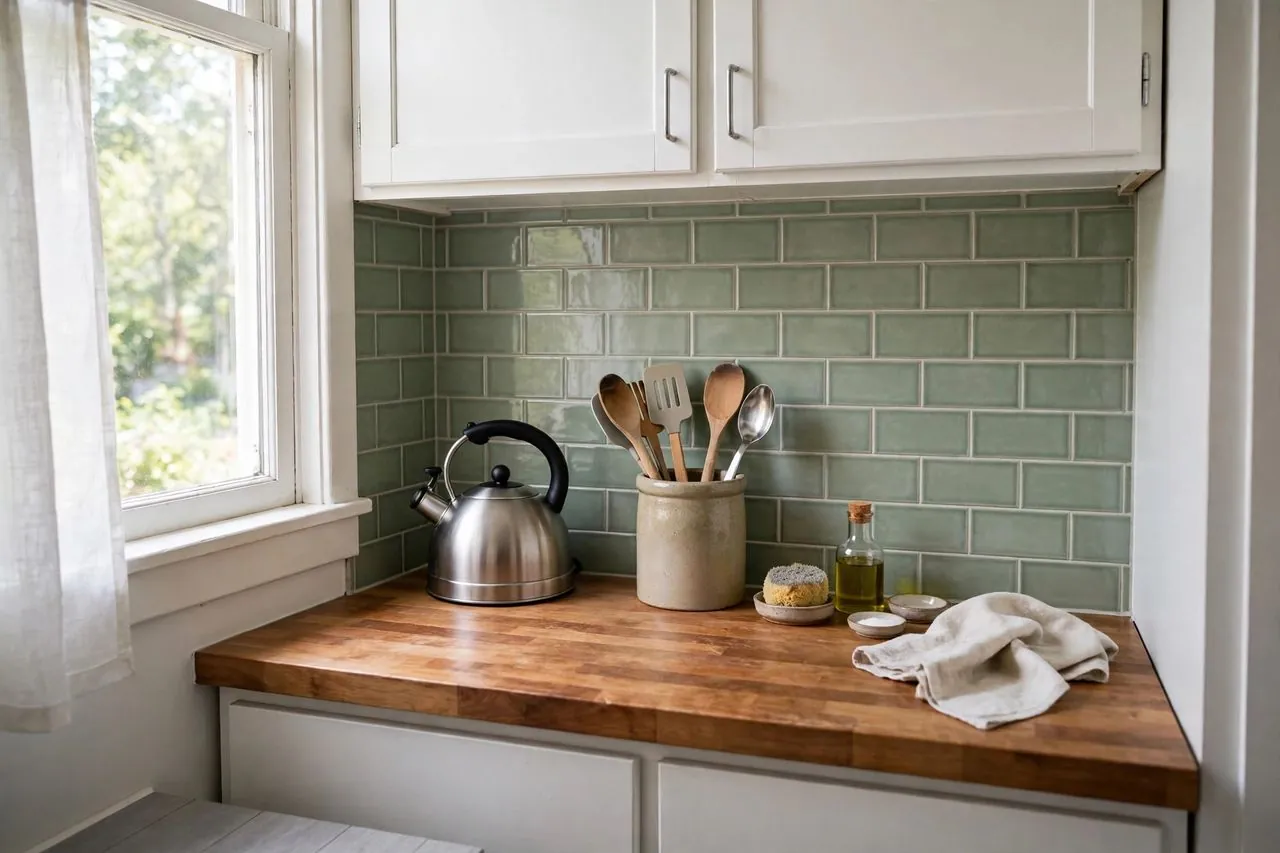
The safest renter backsplash is a flexible vinyl or composite sheet the maker explicitly calls removable, used away from stove heat, on smooth sound paint, after a test patch. Thick gel and permanent-bond tiles can look convincing and still cost your deposit.
If you rent, I know that kitchen wall. It is tired, a little greasy behind the stove, maybe painted a colour you would never have chosen, and it makes the whole room feel older than it is. You cannot rip it out. You cannot tile it properly. Your lease probably says so in language that is not at all vague. And yet you cook there every day, so you look at it every day.
That is why peel-and-stick backsplash sells so well to renters, and it is also why it causes so much quiet trouble. The promise on most packs is simple: peel, stick, transform, remove. The reality is more divided. Some products really are temporary decor. Some are thin stickers that curl by spring. And some are, in every honest sense, a permanent installation that happens to arrive without grout. They will go up beautifully. They just will not come down kindly.
I wrote this guide to keep those three groups separate. You will find the formats I would actually consider in a rental, the wall and stove conditions that change the answer completely, and a clear section on what is not removable, however friendly the listing makes it sound. If you are also working through the rest of a rental kitchen, start with our Peel and Stick hub and our guide to renter-friendly kitchen organization, because a backsplash looks best when the counters are not fighting it.
For most renters with smooth, sound painted walls and a stove that is not pressed tight against the back wall, my first look is a classic subway-style sheet that is sold as removable, not permanent. It is forgiving to align, easy to cut around outlets, and familiar enough that it does not date quickly.
Before you fall for any pattern, though, please do the three checks that matter more than colour. First, read how the maker describes the adhesive, not how a marketplace headline describes the product. Words like removable, low-tack, and repositionable point one way. Words like permanent, extra-strength, and bonds for years point the other way. Second, look at your stove gap and your cooking style. Daily high-heat cooking close to the wall is a different job from a coffee corner that gets wiped once a week. Third, look at your paint honestly. Sound, fully cured paint on smooth drywall is a reasonable surface. Peeling paint, chalky paint, fresh paint, and heavy orange-peel texture are not, no matter what a product photo shows.
The early decision table: pick by your wall, not by the photo
Use this table as a filter, not a shopping list. If your kitchen fails the key constraint for a row, that row is out, even if it is the prettiest option you have seen all week. Renters do not get to choose only on looks, because we are the ones who have to undo the work.
| Pick | Best for | Type | Key constraint | The catch |
|---|---|---|---|---|
| Removable subway sheets | Most renters, classic kitchens | Flexible vinyl or composite sheet | Smooth, sound, fully cured paint | Our top pick, and still not magic: it can lift poor paint and it does not belong tight against open flame |
| Marble-look sheets | Brightening a dark kitchen | Printed vinyl or composite sheet | Large, fairly flat wall with few cuts | Pattern repeat and shiny print can look flat up close, and seams show more than on subway layouts |
| Thin vinyl tile stickers | Small areas, coffee corners, low-splash zones | Thin flexible sticker | Low heat and low moisture only | Easiest removal, weakest illusion: edges curl first and wall texture shows straight through |
| Real-tile-look rigid panels | Longer tenancies with landlord permission | Rigid composite panel | Written permission and a removal plan | Looks most convincing and is the hardest to forgive: strong adhesive and stiff edges make removal the real project |
| Metal-look sheets | Kitchens needing light and a sharper look | Metal-finish or metal composite sheet | Distance from direct heat, careful cutting | Fingerprints show, cuts are less forgiving, and reflective finishes reveal every bump in the wall |
| Backer-panel backsplash | Textured walls or very cautious renters | Peel-and-stick mounted on a removable panel | A panel you can mount and remove within your lease | Most protective route for the wall, but the most work up front and the edges need thoughtful finishing |
Notice what is not in that table as a recommendation for everyone: gel tiles sold on shine alone. Gel is a finish description, not a removability promise. A soft, glossy, three-dimensional surface can feel wonderfully like glazed tile, and some gel products are made for long-term homeowner use with adhesive to match. In a rental, that combination deserves the most questions, not the fewest.
This is for you if
You have smooth or only lightly textured walls, your paint is sound and not freshly applied, and you are willing to test one sheet in a hidden spot before you commit a whole wall. You mostly need protection from everyday splashes, not a heat shield for a commercial-style range. You will photograph the wall before you start, keep spare sheets, and take removal slowly at the end of the lease. You also accept a small trade: a removable product may need the odd corner pressed back down, and that is a fair price for a wall you can hand back.
Skip peel-and-stick for now if
Your paint is peeling, bubbling, chalky, or still curing, your walls are heavily textured, brick, or raw plaster, or your lease flatly forbids adhesive products. Skip it behind the stove if the burners sit very close to the wall and you cook at high heat daily, unless the maker gives a clear heat rating and clearance that fits your kitchen. And skip any product whose fine print says permanent if your plan depends on clean removal. That is not caution talking. That is the deposit talking.
What is NOT actually removable, in plain language
This is the section I wish every listing was forced to print at the top. Removable is not a material. It is a behaviour, and it depends on the adhesive, the surface, the heat the product lives in, and how long it stays up. The same sheet can peel kindly from glossy ceramic tile after a year and take a weak layer of paint with it from old drywall after three summers. So when I say a format is not renter-safe, I mean the risk is built into how it is made and sold, not that one unlucky person once pulled too fast.
Gel tiles: lovely depth, often a homeowner adhesive
Gel-look tiles earn their popularity honestly. That raised, glossy surface catches light, hides the flat sticker feeling, and can make a small kitchen look cared for. The trouble is that many gel products are designed to stay. Their selling points tend to be strong grip, long life, and resistance to steam and splashing, which is exactly what an owner wants and exactly what should make a renter pause. If the description leads with how powerfully it bonds, believe it. Do not let the word peel in the product name overrule the word permanent in the instructions.
Vinyl sheets: removable usually, until heat and time get involved
Plain vinyl sheets and stickers are usually the easiest to remove, especially the thinner and more flexible ones. That is their virtue and their limit. They conform to the wall, they cut with simple tools, and they tend to release with gentle warmth. But easy removal on day one is not a promise for year three. Heat cycles behind a stove, steam by a kettle, and sunlight on one corner all age adhesive unevenly. One edge may lift while the rest has settled in. Plan on slow removal with warmth whenever you take vinyl down, and budget time for residue even when the sheet itself comes away in one piece.
Real-tile-look panels: the better it fools you, the more it asks of the wall
Rigid and semi-rigid panels that imitate stone, marble, or glazed ceramic solve the biggest visual problem in this category, which is flatness. They hold an edge, they reflect light in a more believable way, and they do not ripple over tiny imperfections the way thin stickers do. They also need adhesive that can support that body, and they concentrate force at corners and edges when you try to remove them. On existing hard tile, that may be manageable. On painted drywall, especially paint that was never applied beautifully in the first place, a convincing panel can be the most expensive compliment your kitchen ever received.
Heat behind the stove changes the adhesive, not just the surface
People tend to ask whether a backsplash will melt behind a stove, and that is only half the question. Long before anything melts, repeated heat can soften some adhesives, dry others out, discolour light finishes, and set a bond harder in the exact area you will later try to peel. Open flame is the strictest case, and no renter should improvise there. If the maker does not state a heat limit and a clearance, treat that silence as your answer. Leave the strip directly behind burners bare, use a landlord-approved heat-safe solution for that zone only, or choose a different wall to transform.
Painted walls are the risk nobody photographs
Most removal photos show a sheet coming off ceramic tile or a smooth demonstration board. Rentals are usually painted drywall, and paint is only as strong as the weakest layer underneath it. Old paint over older paint, a quick landlord repaint over grease, or paint applied before the previous coat had cured can all release together. The tile gets blamed, and sometimes that is fair, but often the wall was a layered cake waiting for an excuse. Your hidden test patch, left for a few days and removed slowly, tells you more than a hundred cheerful reviews from people with different walls.
Best for most renters: removable subway-style sheets
If I had to point one friend in one ordinary rental kitchen toward one starting place, it would be this format. Subway layouts are popular for a kind and practical reason: the pattern is made of simple repeating shapes, so a small alignment slip does not shout, a cut around an outlet does not ruin the design, and the finished wall reads as clean rather than themed. That matters in a rental, where your cabinets, counters, and appliances were chosen by somebody else and you are trying to calm the room down, not start a new argument in it.
Look for sheets where the maker uses the language of temporary installation plainly. Check whether the pack says removable, whether removal instructions are included rather than hidden, and whether the maker warns against particular surfaces. A confident removable product usually tells you where not to use it. That honesty is a good sign. Also check the stated sheet size and coverage before you order, because coverage claims vary in how they count overlap, and check whether the finish is matte, satin, or glossy under your kind of lighting. A glossy white in a north-facing kitchen can look crisp. The same sheet under warm under-cabinet lights can look much creamier than the screen suggested.
On surface rules, this format wants smooth, clean, dry, and sound. It can go over existing hard tile if the surface is flat and degreased and the maker allows it, though the raised pattern of the old tile may show through and the edges need extra attention. It is happiest on painted drywall that has fully cured. It is not a fix for crumbling plaster, and it should not be asked to bridge heavy texture. If you can feel strong orange-peel texture with your palm, expect to see it and expect weaker contact across all those tiny high points.
The honest downside, even for our top pick, is that removable does not mean effortless forever. Corners by a steamy sink may lift and need pressing back. The grout-look lines are printed or moulded, not real grout, so up close a cook will know. And removal can still disturb paint that was poorly bonded long before you arrived, which is why the test patch and the before photographs in our deposit protection guide are not optional extras for cautious renters. They are the whole point.
Who should skip this one: anyone with a tight gas range and no stated heat clearance, anyone whose wall fails the test patch, and anyone who wants a dramatic stone slab effect. Subway sheets calm a kitchen. They do not impersonate a quarry.
Best for brightening a dark kitchen: marble-look removable sheets
Marble-look sheets solve a specific rental sadness: the kitchen that gets almost no natural light and has been painted and countered in shades that swallow what little light arrives. A pale, softly veined surface bounces light back into the room and pairs calmly with white, wood, grey, and black cabinets alike. It also photographs beautifully, which is both a recommendation and a warning, because screens are kinder to printed stone than real life at eight in the morning.
Why this format can win is restraint. Choose veining that is soft, sparse, and varied, and the wall looks airy. Choose a print where the same bold vein repeats on every sheet, and the eye catches the pattern within a week. Before ordering a full wall, check whether the maker shows a multi-sheet installation photo rather than a single perfect square, check how the sheets align or overlap, and check the stated finish. A high-gloss finish reflects more light and also reflects every ripple, outlet cut, and seam more honestly. A softer finish is usually more forgiving in an older rental.
The surface rules match the subway sheets: smooth, degreased, dry, and sound, with special care at sink edges where water sits. Marble-look products are often sold for bathrooms too, but a backsplash behind a sink is a splash zone, not a shower, and you should not stretch a kitchen product into a wet-room job the maker did not intend. Keep the bottom edge neat, wipe standing water rather than letting it sit on seams, and be careful with strongly coloured foods and cleaners on pale finishes until you know how your chosen product behaves in an inconspicuous corner.
Downsides deserve plain speech. Printed marble has no depth when you stand close and touch it, and a repeating vein is the fastest way for a lovely idea to look like wallpaper in a meeting room. Pale sheets also show turmeric, tomato, and coffee splashes more readily in daily life, even when they wipe clean. If your household cooks boldly and wipes rarely, a busier or warmer pattern will forgive you more.
Who should skip this one: cooks with very small, cut-up walls full of outlets, because pattern matching will eat your patience, and anyone who dislikes any visible repeat. Choose subway or a small-scale mosaic look instead, and see the calmer options in our kitchen hub.
Best for a tiny splash zone: thin vinyl tile stickers
Not every renter needs a whole wall. Sometimes the problem is one tired strip behind a sink, a coffee station that splashes, or the side wall by a small stove where cups and spoons leave their marks. Thin vinyl stickers are built for that modest job. They are flexible, light, simple to trim, and usually the least dramatic to remove. Used in the right place, they are the sensible small change of this category.
Their virtues are all about kindness to beginners. If a sticker lands crooked, you often have a brief chance to lift and reset it if the maker describes it as repositionable, though you should never count on repeated repositioning because dust on the adhesive ends that kindness quickly. If you mis-cut an edge, you have not ruined a large rigid panel. If your tenancy is short, you are not investing a weekend in a wall you will leave by winter. Check the pack for the stated tile size, whether the design is meant to butt together or overlap, and whether the maker calls the product water-resistant or waterproof, because those words are not interchangeable and the area behind a sink will test the difference.
Now the limits, because this format gets oversold more than any other. Thin means thin. Wall texture telegraphs through, small dents and old filler ridges show, and the finished surface can look like a very good sticker rather than a tile. Edges are vulnerable. Steam, repeated wiping, and a warm wall can start a corner curling, and once one corner lifts it collects grease and becomes harder to rescue. Keep thin stickers away from the hottest stove zone, away from constant standing water, and off any wall that is not genuinely smooth.
I also want to protect you from a false economy here. A whole large kitchen done in the thinnest stickers can take longer, show more seams, and age faster than a better sheet product would have. Small area, short tenancy, low splash: this format shines. Whole kitchen, heavy cooking, three-year lease: it is probably the wrong tool, however cheerful the first afternoon feels.
Who should skip this one: anyone covering heavy texture, anyone expecting a real-tile illusion at touching distance, and anyone whose sink area stays wet. For a bigger transformation with a similarly gentle spirit, pair this idea with renter-friendly wallpaper on a wall away from the splash zone instead of stretching stickers beyond their job.
Best for the real-tile look, with permission: rigid real-tile-look panels
Let us be fair to the panels before we warn you about them. If looking genuinely like tile is your first priority, rigid and semi-rigid real-tile-look panels do it best. Their body holds a straight edge. Their surface can carry a bevel or a stone-like variation that a flat sticker cannot. In a longer tenancy, with a landlord who has said yes in writing, they can turn a bleak kitchen into a room that feels deliberately finished rather than temporarily disguised.
That sentence carries its condition in the middle of it: with permission. Check the product language with fresh eyes before you buy. If the maker talks about permanent installation, long-term bonding, or using extra adhesive, the product is telling you its intended life. Believe the instructions over the influencer video. Check the stated panel size and how edges are meant to meet, check what cutting tool the maker recommends, because rigid panels may need more than kitchen scissors, and check whether replacement sheets are sold in the same finish, because one damaged panel in year two is a miserable match if the line has changed.
Surface rules are stricter here, not looser. A rigid panel does not bend to forgive a wavy wall. Gaps behind a stiff edge become shadow lines and weak points. The wall must be flat as well as smooth, clean as well as dry. Over existing tile, confirm the old surface is sound and level enough that the panel sits flush. On painted drywall, understand that you are asking the paint layer to hold a heavier, stiffer product for the whole tenancy, and removal will pull at that layer with more leverage than a flexible sheet would.
The honest downside is the move-out. Removal is slower, corners can snap or take finish with them, and residue tends to be more stubborn because the adhesive was chosen to support a panel, not to wave goodbye. If you choose this route, keep the packaging and instructions, photograph the wall first, save offcuts, and write your removal plan while installation day is still fresh in your mind. Future you, tired and surrounded by boxes, will be grateful.
Who should skip this one: short tenancies, anyone without written landlord permission, anyone with wavy or weak paint, and anyone who would feel sick spending move-out day on one wall. There is no shame in choosing the gentler product. Renting is a season of life, not a test of bravery.
Best for dark kitchens needing light: metal-look sheets
Metal and metal-look backsplashes have a particular gift: they bounce light around a room that has none to spare. A brushed or softly reflective finish behind open shelves or along a dark run of cabinets can make evening cooking feel less like working in a cupboard. The look suits plain cabinets and simple counters, and it can be the one modern note in a kitchen that is otherwise firmly stuck in another decade.
Choose this format with your cleaning habits in mind. A bright metal finish shows fingerprints, water spots, and fine scratches more readily than a matte printed pattern. If you wipe as you go, that is fine. If your household cooks in a happy whirlwind and cleans on Sundays, a brushed, broken, or mosaic-style metal look will hide daily life far better than a mirror-smooth sheet. Check whether the product is real metal composite or metal-look print, because cutting, edge finishing, and heat guidance differ between the two, and check the maker stated cleaning instructions before you commit, since some finishes dislike abrasive pads and strong chemicals.
Heat deserves a second mention for this category. Metal itself handles warmth differently from vinyl, but a metal-look product is only as heat-tolerant as its full construction, including print, coating, and adhesive. Do not reason from the surface alone. Follow the maker clearance for your exact product, and keep any peel-and-stick material away from open flame. If your stove area is tight, use metal-look sheets on the side runs and leave the burner zone to a solution your landlord approves.
Cutting and edges are the practical downside. Rigid metal composite can need sturdier cutting tools and careful handling so a cut edge does not stay sharp. Flexible metal-look print cuts easily but can crease, and a crease in a reflective surface announces itself forever. Measure twice here more than anywhere. Also look at your wall in raking light before you start: reflection is honest, and bumps you barely noticed on matte paint will wave at you from a shiny backsplash.
Who should skip this one: anyone who hates visible fingerprints, anyone with very uneven walls, and anyone not ready to follow product-specific cutting and heat guidance. If you love light without shine, the marble-look sheets above will treat you more gently.
Best for textured walls and maximum caution: peel-and-stick on a removable backer panel
This is my favourite answer for the renter whose walls should not be touched directly at all. Instead of sticking tiles to the landlord paint, you cover a thin, smooth backer panel with the backsplash you love, then mount that panel in a reversible way your lease allows. The adhesive bonds to a surface you own. The wall keeps its paint. Move-out becomes a matter of taking a panel down and filling or cleaning only what your mounting method touched, which should be as close to nothing as you can manage.
It is more work, and I will not pretend otherwise. You need a panel cut to fit the backsplash area, with cut-outs for outlets planned carefully and safely, and edges finished so the panel reads as intentional rather than improvised. Any work around outlets must respect electrical safety: switch off power for outlet work, and if you are not confident, this is the moment to get qualified help rather than learn by guessing. Check that your chosen panel material is suitable for a kitchen splash zone, that it sits flat, and that the peel-and-stick maker allows application to that panel surface. The backsplash instructions still govern heat, so a backer panel does not turn a heat-sensitive product into a stove shield.
Why go to this trouble? Because it solves three rental problems at once. Textured walls stop mattering, because the panel gives the tile a smooth home. Questionable paint stops mattering, because the adhesive never meets it. And a failed pattern choice stops being a wall emergency, because the whole surface can come down as one piece. For a long tenancy in a kitchen you cook in daily, that peace is worth an extra afternoon. It also pairs beautifully with other no-drill thinking, the same spirit behind our guides to the best no-drill shelves and a magnetic spice rack: change the layer you own, protect the layer you borrowed.
The downsides are real. The panel adds a visible edge and a small step from the wall that sheet-direct installation does not have. It needs storage or disposal at move-out. And the mounting method itself must be genuinely reversible in your home, not merely described as reversible online. Test how the panel will sit, how it will be held, and how it will come down before the first tile goes on it.
Who should skip this one: anyone in a very short tenancy, anyone whose backsplash area is full of awkward angles that would make panel cutting miserable, and anyone whose landlord will happily approve a tested removable sheet directly on excellent paint. Caution has a cost too, and you are allowed to choose the simpler safe route when it truly is safe.
How to choose and install, step by step
Start with the wall audit nobody wants to do
Run your hand over the whole area in daylight and again under your kitchen lights. Look for peeling or bubbling paint, soft plaster, old filler ridges, grease you can feel, and texture you can feel. Wash a small area and watch whether the paint goes chalky on the cloth. Check behind the stove and sink with a torch if you need to. This ten-minute audit decides your format more honestly than any product ranking, including mine. If the wall fails, your choices are the backer panel, a different project, or a conversation with your landlord about repainting. Putting strong adhesive over a failing wall does not rescue the wall. It just schedules the failure for move-out day.
Measure like a person who has to cut around outlets
Measure width and height for each separate run, then add them together, then order extra for cuts, mistakes, and one future replacement sheet. Kitchens are rarely one clean rectangle. Note every outlet, switch, window trim, cabinet end, and the exact place the counter meets the wall. Sketch it on paper, however roughly. When sheets arrive, lay the pattern out on a table or floor first, especially marble and mosaic looks, so a bold repeat or a colour shift lands where you can live with it rather than directly at eye level by the kettle.
Do the hidden test patch, and actually wait
Choose a spot that will be covered later or hidden by an appliance, apply one sheet or a cut piece exactly as directed, and leave it for a few days of normal kitchen life. Then warm it gently and peel it slowly at a low angle. Look at the back of the sheet and at the wall. Paint on the adhesive, a lifted edge of drywall paper, or a shiny patch where finish came away are all clear information. Believe the test over the listing. If the test fails on direct wall application, you still have the backer-panel route, which is why testing early is hopeful rather than disappointing.
Prep is cleaning, degreasing, drying, and then waiting again
Remove loose paint and dust, wash away cooking grease with a cleaner the surface can tolerate, rinse away cleaner residue as directed, and let the wall dry fully. Adhesive and trapped moisture are poor companions. Do not install on paint that has not cured for the period the paint maker and tile maker require. Mark a level starting line instead of trusting the counter, because counters and cabinets in older rentals are not always level, and a backsplash that follows a sloping counter will look drunker with every row. Keep a clean roller or smooth cloth for pressing, a sharp cutting tool suited to your format, a straight edge, and spare blades, because a dull blade tears edges that a sharp blade would have left clean.
Layout, cutting, and the first row
Begin where the eye lands first, often the stove or sink run, and work outward so cut edges fall in less visible places. Peel only as much backing as you can manage calmly. A full sheet of exposed adhesive that brushes a dusty counter has used up its best stick before it reaches the wall. Align, tack lightly if the product allows checking, then press from the centre outward to push air away from the edges. Around outlets, measure and mark on the sheet while it is still backed, cut conservatively, and check the fit before exposing all the adhesive. Keep offcuts until the job is done. Small gaps at cabinet ends and counter joins are usually finished more neatly with a suitable sealant or trim approach the maker allows than by forcing a tile to bend where it does not want to go.
Heat and moisture rules to live by afterwards
Respect the maker clearance behind burners from day one, not after the first discoloured sheet teaches you. Use back burners thoughtfully when a pan will throw serious heat at the wall for a long time, wipe splashes before they bake on, and do not aim a steaming kettle directly at a seam all winter. At the sink, wipe standing water from the bottom edge. Once a month, walk the wall with clean hands and press down any corner that has begun to think about lifting. Caught early, a corner is a ten-second job. Caught after it has collected grease, it is a replacement sheet.
Mistakes and red flags: what NOT to buy
The most dangerous product in this category is not the cheapest one. It is the one whose marketing borrows the language of two different lives at once: permanent strength for the homeowner and effortless removal for the renter. A product can be excellent and still be wrong for you. Read for these red flags before you buy, and let any one of them slow you down.
Permanent-bond gel tiles marketed as renter-friendly
If the fine print says the adhesive is permanent, extra-strong, or intended to last for years without moving, it is not a renter product, even if a marketplace category or a social video calls it one. Gel tiles are the common case because their raised, glossy realism is so appealing in photos. Ask a simple question: is the maker willing to describe removal in the instructions, on the surfaces renters actually have? If removal is never mentioned, or is mentioned only for glass and ceramic tile, you have your answer for painted drywall.
Extra adhesive, primer, or glue suggested for a better hold
The moment a supposedly temporary project needs added glue, a bonding primer, or a construction adhesive to behave, it has left the renter category. Those additions may be sensible for owners. For you, they convert a peel-off layer into a wall repair. The same goes for sealing every edge with a permanent product you cannot undo. If a backsplash cannot stay up on a suitable wall with its own removable system, choose a different backsplash.
No heat information behind a stove
A listing that shows flames licking behind a sheet but gives no temperature guidance or clearance is selling a photograph, not a specification. Heat silence is a red flag, especially for vinyl and printed finishes. Also beware of the opposite trick: a general claim of heat resistance with no distance stated. Resistant to what, at what distance, for how long? If you cannot find out, protect the burner zone by leaving it out of the peel-and-stick plan.
Impossible promises on texture and fresh paint
Any product that claims to stick to every surface, hide heavy texture, and remove cleanly from fresh paint is asking you to believe three difficult things before breakfast. Heavy texture reduces contact. Fresh paint has not finished curing and can bond to adhesive in ways nobody wants. Raw, dusty, or damp surfaces defeat both adhesion and clean removal. A trustworthy maker lists excluded surfaces. A listing with no exclusions is not more versatile. It is less informative.
Coverage that sounds too generous and packs you cannot match later
Check how coverage is counted, whether sheets overlap, and whether the same design is likely to be available if you need one more pack. Colour and print can vary between batches in any printed category, so order what you need, plus spares, in one go when you can. Keep one unopened spare sheet flat and away from heat. A replacement hunt in the final week of a tenancy, trying to match a discontinued marble vein, is a special kind of stress nobody needs.
Using a kitchen backsplash where it was never meant to live
Do not stretch a splash-zone product into a shower, onto a floor, over a fireplace opening, or directly behind open flame because the pattern is perfect. Each of those jobs has heat, water, or wear the product was not judged for in this guide. If the room you really need to fix is the bathroom, start with renter-friendly bathroom storage and our bathroom hub, and treat walls there as their own careful question.
Removal and deposit: getting the wall back
Removal is not the opposite of installation. It is its own job, with its own tools, timing, and patience, and it goes best when you plan it before installation day. Photograph every wall before you start, in good light, including corners and any existing marks. Keep your lease clause, any landlord permission, the product instructions, and those photographs together. At move-out, that little file answers questions faster than memory ever will. Our deposit guide walks through the paperwork side, and it is worth reading before the first sheet goes up, not during the final week.
Removal by format
For thin vinyl stickers, warm one corner gently with a hairdryer on a low setting, lift it with a plastic tool rather than a metal blade, and peel slowly back on itself at a low angle, warming as you go. Rushing is what tears paint and leaves half the adhesive behind. For flexible sheets, work one sheet at a time the same way, supporting the sheet so its weight does not yank the next section. For gel and real-tile-look panels, allow much more time, warm smaller areas, and ease edges gradually. If a panel resists strongly, stop and warm again rather than increasing force. Force is the sound of a deposit leaving. For a backer panel, remove the panel by its mounting method first, then remove tiles from the panel away from the wall if you need to, which is the calmest removal of all.
Residue fixes that respect the wall
A light sticky film often lifts with warmth, patience, and a gentle cleaner tested in a hidden spot. Work from the mildest method upward. Test any adhesive remover on a small area first, because a product that is safe on ceramic tile may dull paint or soften a finish you need to hand back. Never flood a painted wall with solvent, and never scrape with a sharp metal edge at a steep angle. If residue is widespread, work in small patches, keep the surface only as damp as the cleaner requires, and let each patch dry so you can see the true state of the paint before you decide it needs anything more.
When paint lifts anyway
If a patch of weak paint comes away despite careful work, do not panic and do not hide it with a thick smear of filler across a feathered edge. Clean the area, let it dry, and assess honestly. Small, shallow paint loss on a wall the landlord will repaint may be a conversation, especially when your before photographs show the paint was already failing. Larger damage may need proper filling, sanding, and matching paint, and your lease may require you to ask before repainting. What protects you most is not perfection. It is evidence that you tested, chose a suitable product, removed it properly, and dealt with the result openly.
The final check before you hand back the keys
Stand at the kitchen door in daylight and again with the evening lights on, because residue and shiny patches hide in one and reveal themselves in the other. Run a clean hand lightly over the wall to feel for sticky areas your eyes missed. Check outlet covers sit properly, edges by the counter are clean, and no corner of tile or panel remains behind an appliance you rarely move. Photograph the finished wall from the same angles as your before pictures. Then, and only then, call the backsplash done. If this careful approach suits how you like to rent, you will find the same thinking across our over-the-door organizers and the wider small apartment hub: big visual change, small physical footprint, and a clear way back.
Frequently asked questions
- Is peel and stick backsplash really renter friendly?
- It can be, but only when the maker calls that exact product removable, your paint is smooth and sound, and a hidden test patch comes off cleanly. Peel and stick describes how it goes up, not how it comes down. Permanent and extra strong products belong in homes where the owner plans to keep them for years.
- Will peel and stick backsplash damage my painted walls?
- It might, especially if the paint is old, layered, peeling, chalky, or still curing. The adhesive can only be as gentle as the paint is strong. Test one piece in a hidden place, leave it a few days, warm it, and peel slowly. If paint lifts in the test, use a backer panel instead of the wall.
- Can I put peel and stick backsplash behind a gas stove?
- Only if the maker gives a clear heat rating and clearance that fits your stove, and never where open flame can reach the material. Many products give no stove guidance at all, and that silence should be treated as a no. Leaving the burner strip bare is safer than trusting a cheerful product photograph.
- What is the difference between gel tiles and vinyl sheets?
- Gel tiles have a raised, glossy surface that feels closer to glazed ceramic, while vinyl sheets are flatter and more flexible. The important difference is often the adhesive. Many gel products are made for long term homeowner use and bond hard. Vinyl sheets are usually easier to remove, but they look less convincing up close.
- Why do some tiles look real and others look like stickers?
- Thickness of feel, edge shape, surface texture, and print depth all change the illusion. A panel with a slight bevel and varied finish catches light like real tile. A thin flat sticker shows wall texture through it and repeats the same pattern too neatly. Standing close in bright light tells you the truth quickly.
- Can I install backsplash over my existing tile?
- Sometimes, if the old tile is flat, sound, clean, and fully degreased, and the maker allows that surface. Raised patterns and uneven grout lines can show through thinner products and weaken contact. Removal from hard tile is often kinder than removal from painted drywall, but edges still need patience, warmth, and a slow low angle peel.
- What walls should I never stick tiles onto?
- Avoid raw plaster, brick, heavy texture, damp walls, dusty or chalky paint, peeling paint, and paint that has not finished curing. Each one either weakens the bond while the tiles are up or raises the damage risk when they come down. A removable backer panel gives you the same look without asking a bad wall to behave.
- How long will a renter backsplash last?
- That depends on the product, the wall, heat, steam, and how carefully it was installed and cleaned. A suitable sheet on a good wall can serve through a normal tenancy, while a thin sticker near heat may curl early. Judge success by two things together: how it looks while up, and how the wall looks after removal.
- How do I stop corners from lifting?
- Start with a clean, degreased, fully dry wall and press each sheet firmly from the centre outward during installation. Wipe standing water from sink edges and avoid aiming steam at one seam every day. Walk the wall monthly and press lifting corners back early, before grease gets underneath and makes the corner impossible to rescue cleanly.
- Can I cut sheets around outlets myself?
- Yes, with careful measuring, a sharp tool suited to the format, and patience. Mark cuts while the backing is still on, cut smaller than you think, and check the fit before pressing the sheet home. Turn power off for any outlet work, and get qualified help if you are unsure. A neat outlet cut decides the finished look.
- Do I need my landlord permission first?
- Check your lease first, and ask when the lease is unclear or forbids adhesive products. A short written yes protects you far better than a friendly verbal chat. Explain the product is removable, offer your test patch result and before photographs, and agree how the wall will be left. Keep the reply with your tenancy papers.
- What should I check on the pack before buying?
- Check whether the maker calls it removable or permanent, which surfaces are allowed and excluded, any heat rating and stove clearance, the stated sheet size and coverage, how overlap works, and what removal method is described. If removal is never mentioned, that tells you who the product was really designed for. Believe instructions over headlines.
- Is a backer panel worth the extra work?
- For textured walls, weak paint, long tenancies, or anyone who feels anxious about the deposit, yes. The tiles bond to a panel you own, so the landlord wall stays untouched by adhesive. The trade is an extra afternoon, a visible panel edge, and storage at move out. For many cautious renters, that trade feels very fair.
- How do I remove tiles without pulling paint off?
- Warm a corner gently with a hairdryer on low, lift it with a plastic tool, and peel the sheet slowly back on itself at a low angle, adding warmth as you go. Never yank upward or rush a resistant section. If a panel fights you, stop, warm a smaller area, and ease the edge gradually instead of using force.
- What gets sticky residue off the wall?
- Start mild. Warmth, patience, and a gentle cleaner tested in a hidden spot will lift many light films. Stronger adhesive removers can dull paint or soften finishes, so test first, use small amounts, and work in small patches. Let each patch dry so you can judge the paint honestly before deciding whether it needs anything more.
- Can I reuse sheets in my next apartment?
- Usually not well. Once a sheet has been installed, warmed, peeled, and handled, its adhesive is dusty, stretched, and uneven, and the edges rarely sit flat again. A backer panel is the reusable version of this idea, because the whole panel can move with you. Plan on fresh sheets for a fresh wall, and keep spares flat.
- Which pattern is safest in a small rental kitchen?
- A classic subway layout or a small scale, low contrast pattern is usually safest. It calms dated cabinets, hides minor alignment slips, and does not fight your dishes and counters for attention. Bold marble veining and large dramatic repeats can be lovely, but they show seams and repetition sooner, especially on small walls with many outlets and corners.
- What if my test patch pulls paint off?
- Stop and be glad you learned it from one hidden piece instead of a whole wall. Do not switch to a stronger product and hope for a different ending. Your kind options are a removable backer panel, a landlord conversation about repainting first, or a different kitchen project entirely. The test did its job, which was protecting your deposit.