Home › Peel and Stick › Peel-and-Stick Floor Tiles
Best Peel-and-Stick Floor Tiles for Renters, Honestly Judged
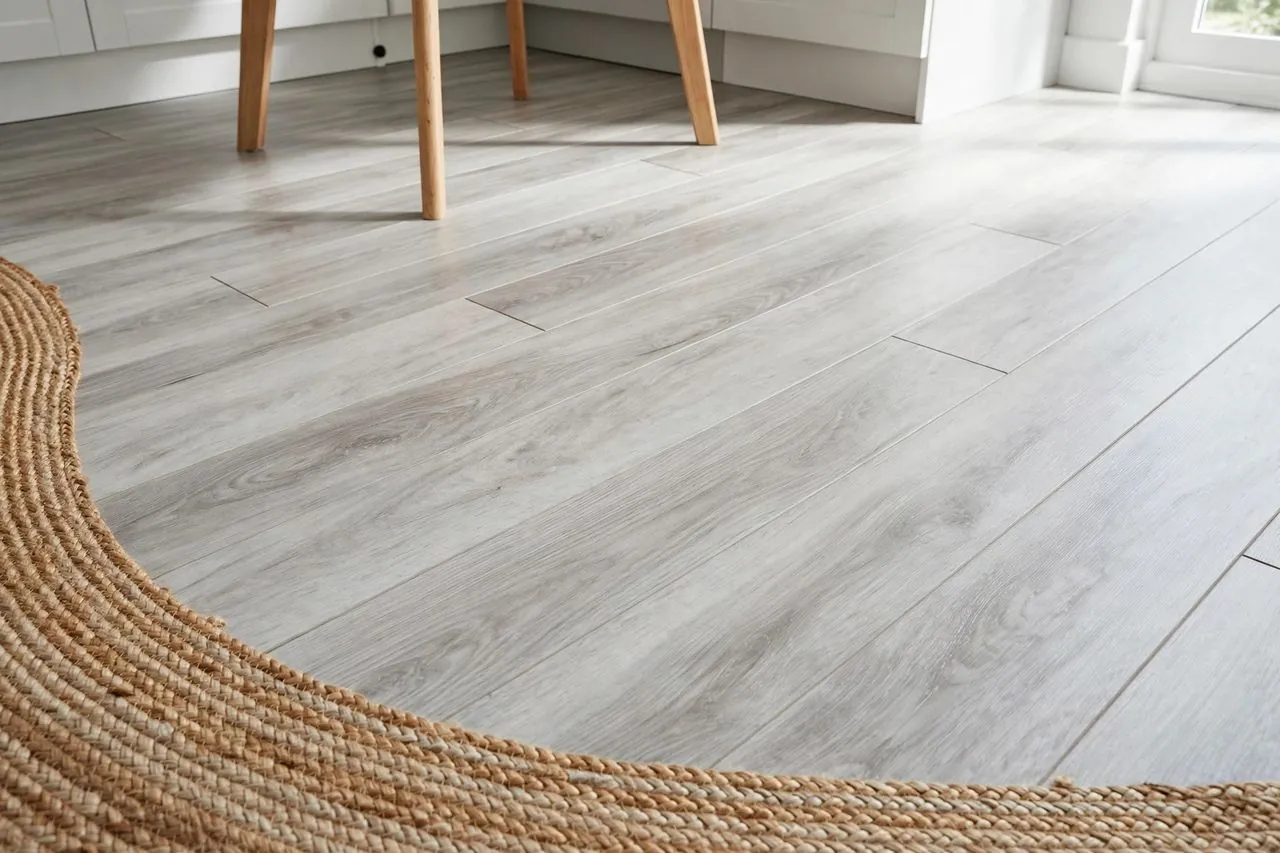
For renters, loose-lay and click-together floors are usually safer than adhesive tiles, and adhesive tiles belong over a protective barrier, never directly on hardwood. If you use peel-and-stick, test removal first, keep water out of seams, and photograph the original floor before you start.
A rental floor works on you slowly. The stained vinyl in the kitchen, the cold cracked tiles in the bathroom, the hardwood that was lovely once and now carries every year of other people's furniture. You walk on it barefoot in the morning. You see it in every photograph you take at home. Of all the surfaces in a rental, the floor is the one you cannot stop noticing.
So the appeal of peel-and-stick floor tiles is easy to understand, and I am not going to talk you out of wanting them. A weekend, no grout, no contractor, and a room that finally looks like yours. But floors are not walls. A wall carries a picture. A floor carries you, your furniture, your spills, your chair legs, and the grit from your shoes, every single day, and at move-out it has to carry the judgement of whoever inspects it. That is why this guide judges floor products by a harder standard than looks.
Here is the honest headline, before any picks: adhesive is the whole question. Loose-lay products that sit on the floor by weight and friction, and click-together products that float as one sheet without glue, can usually be lifted away with the original floor untouched underneath. Adhesive-backed tiles are different. Many use permanent adhesive, because staying down under foot traffic is their job, and permanent adhesive on hardwood, old vinyl, or painted tile can leave residue, lift finish, or both. That does not make them forbidden. It makes them a product to use over a barrier, on the right floor, with a tested exit plan.
If you are deciding between a floor project and a gentler refresh, browse our Peel and Stick hub first, and cross-check your wall plans in our guide to the best peel-and-stick backsplash, because kitchens usually tempt people into doing both at once. For a floor, my safest starting recommendation for most renters is not a tile at all. It is a loose-lay or floating format that never bonds to the floor beneath it.
Three checks before any pattern seduces you. First, identify your original floor precisely: hardwood, laminate, sheet vinyl, ceramic tile, concrete, or painted floorboards all behave differently, and painted and hardwood floors are the vulnerable ones. Second, read how the maker describes the adhesive, and whether the word removable appears in the instructions at all, not only in a marketplace headline. Third, think about water. A floor tile can be water-resistant on top and still let water sit in its seams, which is where bathrooms go wrong. Your room, your floor, and your lease length decide this purchase. The prettiest checkerboard on the internet knows none of those things.
The early decision table: judge by what is underneath
| Pick | Best for | Type | Key constraint | The catch |
|---|---|---|---|---|
| Loose-lay vinyl planks or tiles | Most renters, whole rooms | Loose-lay, no adhesive | Flat floor and room shape that holds edges in place | Our safest pick, and still imperfect: pieces can shift in doorways and it feels less fixed underfoot than a bonded floor |
| Removable adhesive tiles over a barrier | Small bathrooms and kitchens | Adhesive-backed vinyl tile on protective underlayment | A barrier layer your floor and lease allow | The barrier is extra work and a small height step, and seams still are not a waterproof floor |
| Checkerboard peel-and-stick tiles | Classic kitchen and entry looks | Adhesive-backed vinyl tile | Smooth hard floor, not direct hardwood | Bold pattern shows every crooked line, and permanent versions leave serious residue on removal |
| Wood-look adhesive planks | Living rooms and bedrooms | Adhesive-backed vinyl plank | Barrier first, plus a very flat subfloor | Grout-free joins and bumps telegraph through, and plank edges can lift where chairs drag daily |
| Stone-look tiles over existing tile | Covering sound, ugly ceramic tile | Adhesive-backed composite-look tile | Existing tile flat and sound, grout lines managed | Old grout lines can ghost through the new surface, and removal from tile is easier than from wood but rarely residue-free |
| Thin removable floor stickers | Very short tenancies, tiny zones | Thin flexible floor sticker | Dry, low-traffic area only | Gentlest removal, weakest wear: scuffs, edge curl, and a sticker feel underfoot arrive sooner than you hope |
Read the catch column twice. Every format here has one, including the loose-lay option I put first. Renting well is not about finding a product with no downside. It is about choosing the downside you can live with, clean up after, and explain calmly at inspection.
This is for you if
Your original floor is flat, dry, and sound, you know exactly what material it is, and you are willing to protect it with a barrier wherever adhesive is involved. You will test removal in a corner, photograph and measure the room before you start, keep spare tiles from the same order, and lift the floor slowly at move-out instead of treating removal as a demolition party. You also accept that a renter floor is a temporary skin, not a renovation, and you will choose the format that leaves the least evidence.
Skip adhesive tiles entirely if
Your floor is hardwood you would be upset to refinish, painted floorboards, a floor with any damp or lifting problem, or a lease that forbids adhesive flooring. Skip them in a bathroom where water regularly reaches the floor and sits, unless your whole plan, barrier included, is genuinely suited to wet use. And skip any product whose adhesive is described as permanent if it would touch the original floor directly. On wood, that single decision is where most deposit trouble in this category is born.
Loose-lay versus adhesive-backed: the distinction that decides everything
Loose-lay means the floor is held by layout, not by glue
Loose-lay planks and tiles are heavier, grippy-backed pieces designed to sit in place by their own weight, friction, and the pressure of a full room laid tightly together. Click-together floating floors go one step further and lock to each other, forming a single surface that rests on the original floor without bonding to it. For a renter, that is a beautiful arrangement. Removal is lifting, not peeling. There is no residue to dissolve and no finish being pulled at. Your main jobs are keeping the original floor clean underneath at the start, using a suitable protective underlayment if the maker recommends one, and leaving the small expansion space the instructions ask for so the surface does not buckle in warm weather.
Loose-lay is not flawless. Individual pieces can creep in a doorway or under a chair that drags the same way every day. A floating floor can sound slightly hollow, feel a little springy over an uneven patch, and raise the floor enough to catch a door that already had little clearance. Check door clearance with one piece laid at the doorway before you order a roomful. Those are annoyances, though, not deposit disputes, and annoyances are the right category of problem for a renter to choose.
Adhesive-backed means staying down is the design goal
Now consider the adhesive tile from its maker point of view. It must resist feet pivoting in kitchens, chairs scraping in dining corners, humidity in bathrooms, and grit working at its edges. A gentle adhesive that releases sweetly after two years is, from that angle, a product that might lift in month three. So many adhesive floor tiles use strong or explicitly permanent adhesive, and they are honest about it in the instructions if you read that far. Peel and stick tells you there is no separate glue pot and no grout. It does not tell you the bond is temporary. Treating those phrases as the same is the most expensive misunderstanding in this whole guide.
Why hardwood is the floor to protect most
Hardwood carries three risks at once. Adhesive can bond to the finish and pull or dull it on removal. Residue removers that would be fine on ceramic can soften or discolour a wood finish. And moisture trapped under a low-permeability tile layer can mark wood over a long tenancy, especially near sinks and doors. Angi and experienced rental renovators give the same blunt advice in different words: do not put peel-and-stick directly over true hardwood. If your heart is set on the look, the barrier strategy below is not an optional refinement. It is the method.
The underlayment and barrier strategy, explained simply
A barrier is a continuous layer between the original floor and any adhesive, so the adhesive bonds to a surface you own and can sacrifice. Depending on the room and the products involved, renters use a suitable loose underlayment sheet, a layer of removable floor protection, or a thin panel approach in small areas, always checking that the tile maker allows application onto that layer and that the combined height still clears doors and appliances. The barrier must lie flat, extend across the whole tiled area without gaps at the edges, and be something that itself lifts without residue. A barrier with wrinkles becomes a floor with wrinkles, because thin tiles faithfully copy whatever is beneath them. Test the full sandwich in a corner: original floor, barrier, tile, a few days of walking, then removal of all three layers. That small experiment is the most trustworthy page in this entire guide, and you write it yourself.
Best for most renters: loose-lay vinyl planks and tiles
This is the pick I would defend in front of your landlord, which is exactly the standard a renter product should meet. Loose-lay vinyl in plank or tile form gives you the full visual change, wood looks, stone looks, and classic checkerboards included, without asking anything sticky to touch the original floor. Lay it well, live on it, lift it when you leave, and take it with you if the next home can use it. That is what temporary should mean.
Why it wins is not only removal. A room laid as one interlocked or tightly butted surface behaves better day to day than individual stickers, because movement in one piece is restrained by its neighbours. Spills sit on top of a washable vinyl surface. A damaged piece in the middle of a room can often be lifted and swapped without disturbing the whole floor, which is a kindness no bonded floor offers. Check the pack for the format, whether pieces lock or butt together, what underlayment the maker recommends, and the stated room exclusions, because even honest products usually rule out very uneven floors and some wet uses.
Floor rules still apply. The original floor must be clean, dry, and reasonably flat, because loose-lay copies the shape beneath it and a ridge will rock a plank until the edges complain. Sweep and then sweep again: one piece of grit under a plank becomes a pressure point you can feel through socks. In kitchens, confirm appliances can move back over the new height, and in doorways test the door swing. In bathrooms, follow the maker wet-area guidance strictly and think hard about water at the bath and toilet base, where a floating surface has edges water can find.
The downsides are the honest ones from the table. It can feel and sound a little less solid than a bonded floor, especially in an empty room. Pieces can shift at thresholds if the layout is not held neatly. It costs you more thought at edges and transitions than a sticker does. And it will not fix a floor that is uneven, damp, or damaged. Covering a problem floor hides it from you, not from time, and landlords rightly dislike discovering a damp patch that was quietly carpeted over with vinyl.
Who should skip this one: anyone with a very uneven floor, a door that already scrapes, or a tenancy so short that a good rug would do the same job with no cutting at all. For zoning a living area without touching the floor, our small apartment hub has gentler starting points.
Best for small bathrooms and kitchens: removable adhesive tiles over a barrier
If you want the neat, fitted look of individual tiles in a small room, this is the responsible way to get it: adhesive tiles whose maker describes them as removable, laid not on your landlord floor but on a continuous protective barrier you have already tested. Small rooms suit this method because the barrier is manageable, cuts are fewer, and you can keep a close eye on every seam in daily life.
The tile choice itself matters. Check whether removable appears in the maker instructions, what surfaces are approved, whether the product is described as water-resistant or waterproof, and what the maker says about bathrooms specifically, because a kitchen splash and a bathroom floor are different amounts of water. Check the stated tile size and pack coverage, and lay the pattern out dry first. In a tiny bathroom, one misaligned row is visible from everywhere, including the mirror.
Moisture is the limit you must respect while you live on it, not just on installation day. These floors resist splashes. They are not a sealed wet-room surface, because every seam is a place water can enter if it is allowed to sit. Wipe bath and shower splashes promptly, use a bath mat that itself dries rather than trapping water against the seams, fix a dripping tap or a toilet base leak before you tile around it, and lift a corner in a hidden place once in a while during a long tenancy to check that the barrier and floor beneath are dry. That five-minute check can save a ceiling-downstairs conversation nobody wants.
Downsides: the barrier adds a step at the doorway and a layer of planning, a failed barrier choice undermines the whole method, and the finished floor still will not tolerate standing water, steam mopping, or a flooded bath. If your household floods the bathroom floor daily, the honest answer is a washable mat strategy and a conversation with the landlord, not a tile product working beyond its design.
Who should skip this one: anyone unwilling to test the barrier sandwich first, anyone with an active leak or damp floor, and anyone tiling around a toilet with a known wobbly base or seal problem. Fix the water first. Decor comes second, and our renter-friendly bathroom storage guide can improve the room while you wait.
Best for the classic checkerboard look: adhesive vinyl tiles, barrier first
A black and white, sage and cream, or warm marble checkerboard can rescue a rental kitchen like almost nothing else. It is cheerful, it suits old cabinets, and it makes a plain room look deliberately styled. It is also the pattern most likely to expose a crooked installation, because every line is a comparison with the line beside it. Choose it with respect for geometry.
Why this format earns its place is choice and repairability. Individual square tiles let you alternate colours, run a border, and replace one damaged tile in a high-wear spot without redoing the room. Check the stated size and whether tiles are sold in balanced colour packs or need separate ordering, check how the maker wants the layout centred, and order all colours in one go so print and finish match. Lay the whole floor dry before a single backing comes off, stand at the doorway, and look. The doorway view is the one you will live with.
The floor rules are strict. A smooth, flat, hard floor or your tested barrier only. Never directly on hardwood, never on painted boards, and think carefully over old sheet vinyl, because removal can pull at its surface too. Over existing ceramic tile, plan for grout-line telegraphing: the lines and slight level changes of the old floor can ghost through thinner new tiles as a faint grid, especially in low sunlight across the floor. A suitable smoothing or underlayment approach the maker allows can reduce that ghosting. Skipping it to save an afternoon usually buys you a visible reminder for the whole tenancy.
The catch on removal needs repeating for this beloved pattern. Many checkerboard tiles are sold with permanent adhesive, and permanent adhesive leaves significant residue that must be scrubbed, sometimes at the cost of the finish underneath. That is precisely why the barrier is in the pick name. If you fall for a permanent-bond tile design, admire it, then find the same look in a loose-lay or barrier-safe removable format. The pattern will make you just as happy. The exit will make you happier.
Who should skip this one: anyone whose room is badly out of square and who knows crooked lines will torment them, anyone tiling direct to wood, and anyone in a very wet kitchen area by a leaking dishwasher. A calmer plank layout, below, forgives crooked rooms far more kindly.
Best for a warm wood look: vinyl plank formats over underlayment
Wood-look planks are the quiet achievers of rental flooring. They warm a living room, make a bedroom feel finished, and hide the small scuffs of daily life better than a pale flat tile does. In plank form the eye follows long lines rather than checking a grid, so an older room that is not perfectly square looks calmer, and furniture settles into the layout naturally.
Whether you choose a loose-lay plank or an adhesive plank over a tested barrier and underlayment, judge the print the way you judged marble in a kitchen: repetition is the giveaway. Check whether the pack shows several different plank patterns or one grain repeated endlessly, check the stated plank size, and lay pieces from several packs in rotation so any repeated grain is scattered rather than marching in step. A warm mid-tone usually forgives dust, pet hair, and small marks better than a very dark or very pale floor, which matters if you clean like a normal person with a normal week.
Underlayment deserves its own paragraph for planks, because it does three jobs when the maker allows it. It smooths tiny imperfections so they telegraph less, it softens the sound and feel underfoot, and in a rental it can be the protective layer between adhesive and original floor. But underlayment is not a mattress for a bad floor. Lumps, grit, and a ridge between old tiles will still announce themselves, and a soft layer under a thin plank can make joins flex and open. Flat, clean, and dry beats thick and hopeful, every time.
Daily-life downsides: chair legs and dragged furniture are the enemy of any plank edge, so felt pads are not a suggestion, they are part of the installation. Rolling chairs need a mat. A plank by an exterior door will take grit and water beyond what a hallway piece sees, so a real doormat outside the tile plan protects the whole room. And while one plank can be replaced, matching sheen after a year of light and wear is imperfect, so keep spares and accept a repair that reads as a repair up close.
Who should skip this one: anyone with a home office rolling chair and no mat, anyone expecting to hide a badly uneven floor, and anyone whose original floor is precious hardwood without a barrier plan. In that last case, go back to pick one and sleep better.
Best for covering sound but ugly tile: stone-look tiles, with grout lines managed
Some rental bathrooms and kitchens have ceramic tile that is solid, level, and completely unlovely. If the tile and grout are sound, covering it can be a sensible renter move, because hard tile is a far more forgiving surface for adhesive than wood or paint, and removal, while rarely clean, is less likely to destroy what is underneath.
The central problem has a name worth learning: telegraphing. Thin new tiles copy the old floor faithfully, so grout joints, a slightly proud tile corner, or a cracked glaze line can show through the new surface as a ghost pattern, feelable underfoot and visible when light rakes across the room. Fight it by choosing a format the maker approves for use over tile, preparing a flat surface with a suitable approach the instructions allow, and avoiding the thinnest stickers for this job. Check the stated thickness and construction on the pack rather than assuming a stone look means a stone-like body. The look is printed or moulded. The body is what decides how much of the old floor shows through.
Preparation rules for old tile are unglamorous and decisive. Clean grout as well as tile faces, degrease the whole area, repair any loose tile rather than bridging it, and let everything dry completely. Check around the toilet, bath, and sink for failed seals and old water damage before you cover anything. A new surface over a damp corner does not solve damp. It hides the evidence while the problem grows, and no deposit strategy survives that discovery.
Downsides: the floor height rises at thresholds, a future removal day will still involve residue work on the old tile, and if the landlord loved that ugly tile, you need permission in writing before it disappears under yours. Ugly is a matter of taste, and the person who owns the floor gets the final vote on taste.
Who should skip this one: anyone with loose, cracked, or damp original tile, anyone unwilling to deal with grout telegraphing honestly, and anyone renting a home where the tile may be a period feature the landlord values. Sometimes the grown-up project is a deep clean, a new bath mat, and better storage, and our bathroom hub can help with all three.
Best for a very short tenancy: thin removable floor stickers in a dry zone
There is a small, honest job for the thinnest adhesive floor stickers: a few months in a dry entry corner, a dressing area, a laundry nook that stays dry, or a tiny kitchen run where you need cheerful cover and an easy exit more than you need durability. In that narrow role, they are light, simple to trim, and usually the gentlest adhesive products to lift.
Judge them by freshness of expectation. Check that the maker calls them removable, check the stated size and whether the design needs pattern matching, and keep your project small enough that replacing a worn piece is trivial. Put your best pieces in the visible centre and your offcuts where a mat or furniture will sit. Use a mat at the door anyway, because grit is the fastest wear this format will ever meet, and a mat is cheaper than a second pack.
Now the limits, stated lovingly but clearly. Thin stickers scuff, their edges can curl where feet pivot, they copy every bump beneath them, and under a chair they will age in weeks rather than seasons. Water at seams lifts them, steam cleaning is out of the question, and a large room done in this format can look tired before the tenancy does. If you find yourself planning a whole flat in the thinnest product available, stop and price the loose-lay route for the main rooms instead. Your future self, sweeping a floor that still looks calm in month ten, will approve.
Who should skip this one: families with heavy foot traffic, anyone with dogs whose nails and outdoor grit rule the hallway, and anyone tiling a bathroom floor that gets properly wet. For busy shared spaces, the storage and traffic ideas in our over-the-door organizers guide may improve daily life more than a fragile floor ever will.
How to choose and install, step by step
Identify and audit the original floor
Name the floor before you shop: hardwood, laminate, sheet vinyl, ceramic, concrete, or painted boards. Then audit it. Walk it in socks for ridges and loose spots, look for damp, staining, lifting edges, and old damage, and photograph everything, including corners and thresholds, before you cover a square inch. Those photographs, kept with your lease and any landlord permission, are your baseline in our deposit protection guide. Report existing damp or damage to the landlord in writing rather than tiling over it. A covered problem becomes your problem in the retelling, every time.
Choose the system, not just the tile
Your purchase is a system: original floor, optional barrier or underlayment, tile or plank, edge and threshold plan, and removal method. Write those five lines down for your room before ordering. If any line is a shrug, the plan is not ready. Check the maker stated coverage and order extra from the same batch for cuts and spares, check whether pattern direction matters, and confirm the total added height against doors, the toilet base, and appliances that must slide out for cleaning or repair.
Test the full sandwich in a corner
Lay your exact barrier and tile in a hidden corner, walk on it for a few days, spill a little water on a seam and wipe it as you normally would, then remove everything slowly. Look at the original floor in good light. Residue, dulled finish, or a barrier that itself sticks are all stop signs. Also check how the tile felt: rocking, hollow edges, or a seam that catches a sock will not improve at room scale. A failed test has saved you a room-sized mistake for the cost of a few tiles.
Prep, layout, and the centre-out rule
Clean the floor, degrease kitchen areas, vacuum, then wipe and let it dry fully. Lay the barrier flat with no gaps or wrinkles if you are using one. Find the centre of the room or the visual centre of the main doorway view, lay the full pattern dry, and adjust so edge cuts are balanced and no sliver-thin pieces land at the busiest threshold. For planks, stagger joins as the maker directs and mix pieces from different packs. For checkerboards, check your lines against the longest wall and again from the door. Floors are read from standing height, in motion, so step back often.
Cutting, edges, and furniture
Cut with the tool the maker recommends for that format, on a board you can sacrifice, and keep blades fresh because torn edges lift. Fit around toilet bases, pipes, and door frames conservatively, checking each piece dry before committing adhesive. Leave the expansion or edge behaviour the instructions require for floating formats rather than jamming every edge tight. Once laid, add felt pads to every chair and table leg, a mat at exterior doors, and protectors under anything that gets dragged. Most renter floor damage I worry about is not installation damage at all. It is six months of one unpadded chair leg, faithfully grinding.
Living with seams and moisture
Vacuum or sweep grit before it works into seams, mop damp rather than wet unless the maker allows more, and wipe spills promptly, especially at the sink, dishwasher, bath, and pet bowls. Never steam mop a peel-and-stick or loose-lay floor unless the maker explicitly permits it, because heat and driven moisture attack exactly the joins and adhesive you depend on. Once a season, check a hidden edge and the area by water sources. A floor you inspect occasionally rarely surprises you at move-out.
Mistakes and red flags: what NOT to buy or do
Adhesive tiles direct on hardwood
This is the headline mistake, so it gets the headline place. Permanent and even ordinary adhesive can leave heavy residue on wood, pull or dull the finish during removal, and demand solvents that the finish was never meant to meet. Add the moisture question over a long tenancy and there is no version of direct-on-hardwood that I can call renter-safe. If a product page shows a beautiful installation over gleaming wood boards, admire the styling and then read the adhesive description. The photograph is selling the first day. You are the one who has to live through the last day.
Believing waterproof on the box means waterproof at the seams
A tile surface can shed water perfectly while the floor as a whole leaks at every join. Bathrooms, kitchens by the dishwasher, and laundry corners punish that misunderstanding. Red flags are standing water left to sit, a bath mat that stays damp against seams, and any product whose bathroom claim rests only on the surface material with no guidance about seams, edges, or subfloors. Water resistance is a splash rating for daily life, not permission to treat a tiled-over floor like a sealed tray.
No barrier, no test, no photographs
Skipping the corner test because the room is small, skipping the barrier because the tile was described as gentle, and skipping before photographs because the floor looked obviously tired are the three shortcuts that convert a manageable project into an argument. Arguments at move-out are won with records, not with how confident you felt in the shop. The test, the barrier, and the photographs are the product. The tiles are just the visible part.
Covering damp, damage, or a leak
Never lay any floor over damp, a spreading stain, a soft patch, loose tiles, or a known drip. You trap moisture, you hide evidence, and you may be blamed for damage that was quietly growing before you arrived. Report it, photograph it, and let the owner fix the building. Decorating over a building problem is the one renter project that can turn a cosmetic budget into a liability conversation.
Ignoring door clearance and appliance access
A floor that stops a door swinging, traps a dishwasher that later needs repair, or raises a toilet area without regard to its seal has failed at the practical level no matter how it photographs. Test heights at every moving thing in the room before the full lay. Landlords and repair people both judge a renter floor by whether the room still works, not by the pattern.
Extra glue to help a temporary floor behave
If an adhesive tile will not stay down on a suitable, prepared floor, adding stronger glue, adhesive primer on the original floor, or a permanent sealant at every seam ends the renter experiment and starts an alteration. Stop, change format, and choose loose-lay or a barrier method instead. The same discipline applies in the bathroom and kitchen elsewhere in the home, which is why our guides to no-drill shower caddies and adhesive shower shelves all ask the same question in different rooms: how does it come off?
Removal and deposit: protecting the original floor
Plan removal day while the floor still looks new, ideally in a note you keep with the product instructions: what system you laid, where the barrier edges run, which tiles were spares, and which corner your test taught you to start from. At move-out, clear and clean the room first, because gritty residue work on a dirty floor grinds dirt into the surface you are trying to save.
Removal by format
Loose-lay and floating floors are the calm case. Lift pieces in reverse order from a threshold or edge, keep them flat if you hope to reuse them, and sweep as you expose the original floor so grit is not walked across it. Adhesive tiles over a barrier come up in two stages: warm and peel the tiles from the barrier, then lift the barrier itself, checking that nothing has migrated at the edges. Adhesive tiles laid directly on a hard floor, if that is the situation you inherit, need gentle warmth, a plastic lifting tool, a slow low-angle peel, and generous time. Residue work follows the same ladder as in our backsplash guidance: start with the mildest cleaner the original floor can tolerate, test any adhesive remover in a hidden spot, work in small patches, and never use a solvent freely on wood finish or painted boards without knowing it is safe there.
Residue, honestly assessed
Expect some residue from adhesive products and you will plan enough time. Panic is what causes the real damage: hard scraping at a steep angle, flooding with remover, or sanding a finish that only needed cleaning. Work slowly, let each patch dry, and judge it in daylight and evening light, because a sticky sheen hides in one and shows in the other. If finish has lifted on wood or paint has come away on boards, do not improvise a refinish in your final week without the landlord in the conversation. Your before photographs and your written permission, if you had it, are worth more at that moment than any product in a cleaning cupboard.
The final inspection walk
Walk the empty room in socks, slowly, in both directions. Your feet will find ridges, sticky patches, and grit your eyes missed. Check thresholds, the toilet and sink surrounds, under where appliances stood, and the doorway swing. Photograph the restored floor from the same angles as your before pictures, including one wide shot from the door. Then invite the comparison yourself, in writing, while everything is fresh. Renters who document the way back rarely fear inspection day, and that calm is the real return on every careful choice in this guide. If you are planning the rest of your move-out, our no-drill shelves guide and no-drill storage hub follow the same rule everywhere: change what you own, protect what you borrowed, and keep the evidence.
Frequently asked questions
- Are peel and stick floor tiles actually renter friendly?
- Some are and many are not. Peel and stick only describes easy installation without separate glue or grout. Plenty of floor tiles use permanent adhesive because they must survive foot traffic, and those can leave heavy residue. Loose-lay formats and removable tiles over a tested barrier are the versions I would call genuinely renter friendly.
- Will peel and stick tiles damage hardwood floors?
- They can, and hardwood is the riskiest floor in this category. Adhesive may bond to the finish, removal can dull or lift that finish, and residue removers can discolour wood. Moisture trapped underneath over a long tenancy is another concern. Never lay adhesive tiles directly on hardwood. Use loose-lay, or a tested protective barrier first.
- What does loose-lay mean and why is it safer?
- Loose-lay planks and tiles stay in place through weight, friction, and a tight full-room layout instead of glue, while click-together floors lock to each other and float. Nothing bonds to the original floor, so removal is lifting rather than peeling. Pieces can still shift at doorways, but there is no residue and no finish at risk.
- Can I use peel and stick tiles in a rental bathroom?
- Carefully, in a small bathroom, with a product the maker approves for that use, a protective barrier, and a household habit of wiping splashes promptly. The tile surface may resist water while seams still let it through to sit underneath. A bathroom where water regularly pools on the floor is not a good candidate for this floor.
- What is an underlayment barrier and do I need one?
- A barrier is a continuous flat layer between the original floor and any adhesive, so the adhesive bonds to a surface you own. Underlayment can also smooth tiny imperfections and soften sound. Over hardwood, painted boards, or any floor you must protect, yes, treat the barrier as essential, and test the complete layered system in a corner first.
- Why can I see the old grout lines through my new tiles?
- That effect is called telegraphing. Thin tiles copy the surface beneath them, so grout joints, ridges, and slightly raised tile corners show through as a ghost grid, especially in low light across the floor. Preparing a flat surface, using a suitable underlayment the maker allows, and avoiding the thinnest products over tile all reduce the effect.
- How do I test whether tiles are safe for my floor?
- Lay the exact barrier and tile you plan to use in a hidden corner, live on it for a few days, then remove it slowly and inspect the original floor in good light. Residue, dulled finish, or a barrier that sticks are clear stop signs. A small failed test is a success, because it prevents a room sized mistake.
- Do I need landlord permission to lay floor tiles?
- Check your lease, and ask in writing whenever flooring or adhesive products are restricted or the lease is unclear. Explain that the system is loose-lay or barrier protected, that the original floor will be photographed first, and that everything lifts at move out. Keep the written reply with your before photographs and the product instructions.
- How long will a renter floor like this last?
- It depends on the format, the room, foot traffic, grit, chairs, and water. A loose-lay floor in a living room can serve a full tenancy and move with you, while thin stickers in a busy hallway may scuff and curl early. Judge any floor by daily appearance and by the state of the original floor at removal.
- Can I put tiles over my existing ceramic tile?
- Sometimes, if the old tile is sound, level, clean, and dry, and the new maker approves that surface. Repair loose tiles first and plan honestly for grout line telegraphing through thinner products. Removal from hard tile is usually less destructive than removal from wood, but expect residue work, and get permission if the landlord values the original tile.
- What floors should never get adhesive tiles?
- Keep adhesive directly off hardwood, painted floorboards, damp or damaged floors, loose or lifting vinyl, and any floor your lease protects. Those surfaces either bond badly, release their finish on removal, or hide a moisture problem that covering will make worse. Loose-lay over a suitable underlayment, or a different plan entirely, is the safer answer there.
- How do I stop tiles lifting at the edges?
- Start flat, clean, and completely dry, lay the pattern dry first, and press or settle each piece as the maker directs. Keep grit swept, wipe water from seams, use felt pads so chairs do not drag edges, and place a mat at exterior doors. A lifting edge caught early can be rescued. One filled with grit usually cannot.
- Can I mop and steam clean these floors?
- Mop damp rather than wet unless the maker allows more, and wipe spills promptly at sinks, dishwashers, baths, and pet bowls. Avoid steam cleaning unless the maker explicitly permits it, because steam drives heat and moisture into seams and adhesive, exactly where these floors are weakest. A soft broom and a lightly damp mop handle daily life well.
- How do I remove adhesive tiles without a mess?
- Warm one edge gently, lift with a plastic tool, and peel slowly at a low angle, working tile by tile and sweeping as you expose the floor. If tiles sit on a barrier, peel them from the barrier first, then lift the barrier. Rushing, steep scraping, and flooding the floor with remover cause more damage than patience ever will.
- What removes sticky residue from the original floor?
- Start with the mildest cleaner that floor can tolerate, test any adhesive remover in a hidden place, and work in small patches that you let dry before judging. Be especially careful on wood finish and painted boards, where strong removers can dull or soften the surface. Widespread residue is a slow job, not a forceful one.
- Will the new floor make my door stick?
- It can. Tile, underlayment, and barrier layers all add height, and a door with little clearance may scrape or stop swinging freely. Test one complete layered piece at the doorway before ordering, and check appliances that must slide out and the swing of every door in the room. Discovering a trapped dishwasher after installation is a miserable afternoon.
- Can I take a loose-lay floor to my next home?
- Often yes, and that reusability is one of its best renter qualities. Lift pieces in reverse order, keep them flat and clean, and store spares with them. Room shapes differ, so edges and cuts from the old home rarely fit the new one perfectly. Keep extra pieces from the original order, because matching a discontinued finish later is difficult.
- What should I photograph before I start?
- Photograph every wall edge, corner, threshold, and any existing stain, scratch, or damage, plus one wide shot from each doorway, in good light. Keep those images with your lease, landlord permission, and product instructions. At move out, retake the same angles after removal. Matching before and after photographs end most deposit arguments before they begin.